I would say that it is more of an experiment to help develop my skills and knowledge in pattern making, and so that I become accustomed to interpreting how structural garments such as a military tunic should shape and sit on the body.

My inspiration is primarily from the 7th Regiment French Imperial Hussars 1812. This photo is of a Captain of the 7th Hussars, however I am not planning to include the captains chevrons on the cuffs, and rather it being one chevron or a russia braid design such as the one that I had practised prior.

The dolman will be dark green, the cuff and collar will be red, and I am planning on having the lace & buttons gold rather than yellow.
I want to look at this experiment as I would if I were making a bespoke jacket for a customer as a freelance costume maker so as to get a bit of experience with what professional freelance work could possibly be like. I started by drafting a basic jacket block to my models measurements which was simple enough. The basic jacket block does not have any shaping to it, which essentially gives me a sort of 'blank canvas' to work from.
Toile No. 1

Toile No. 2
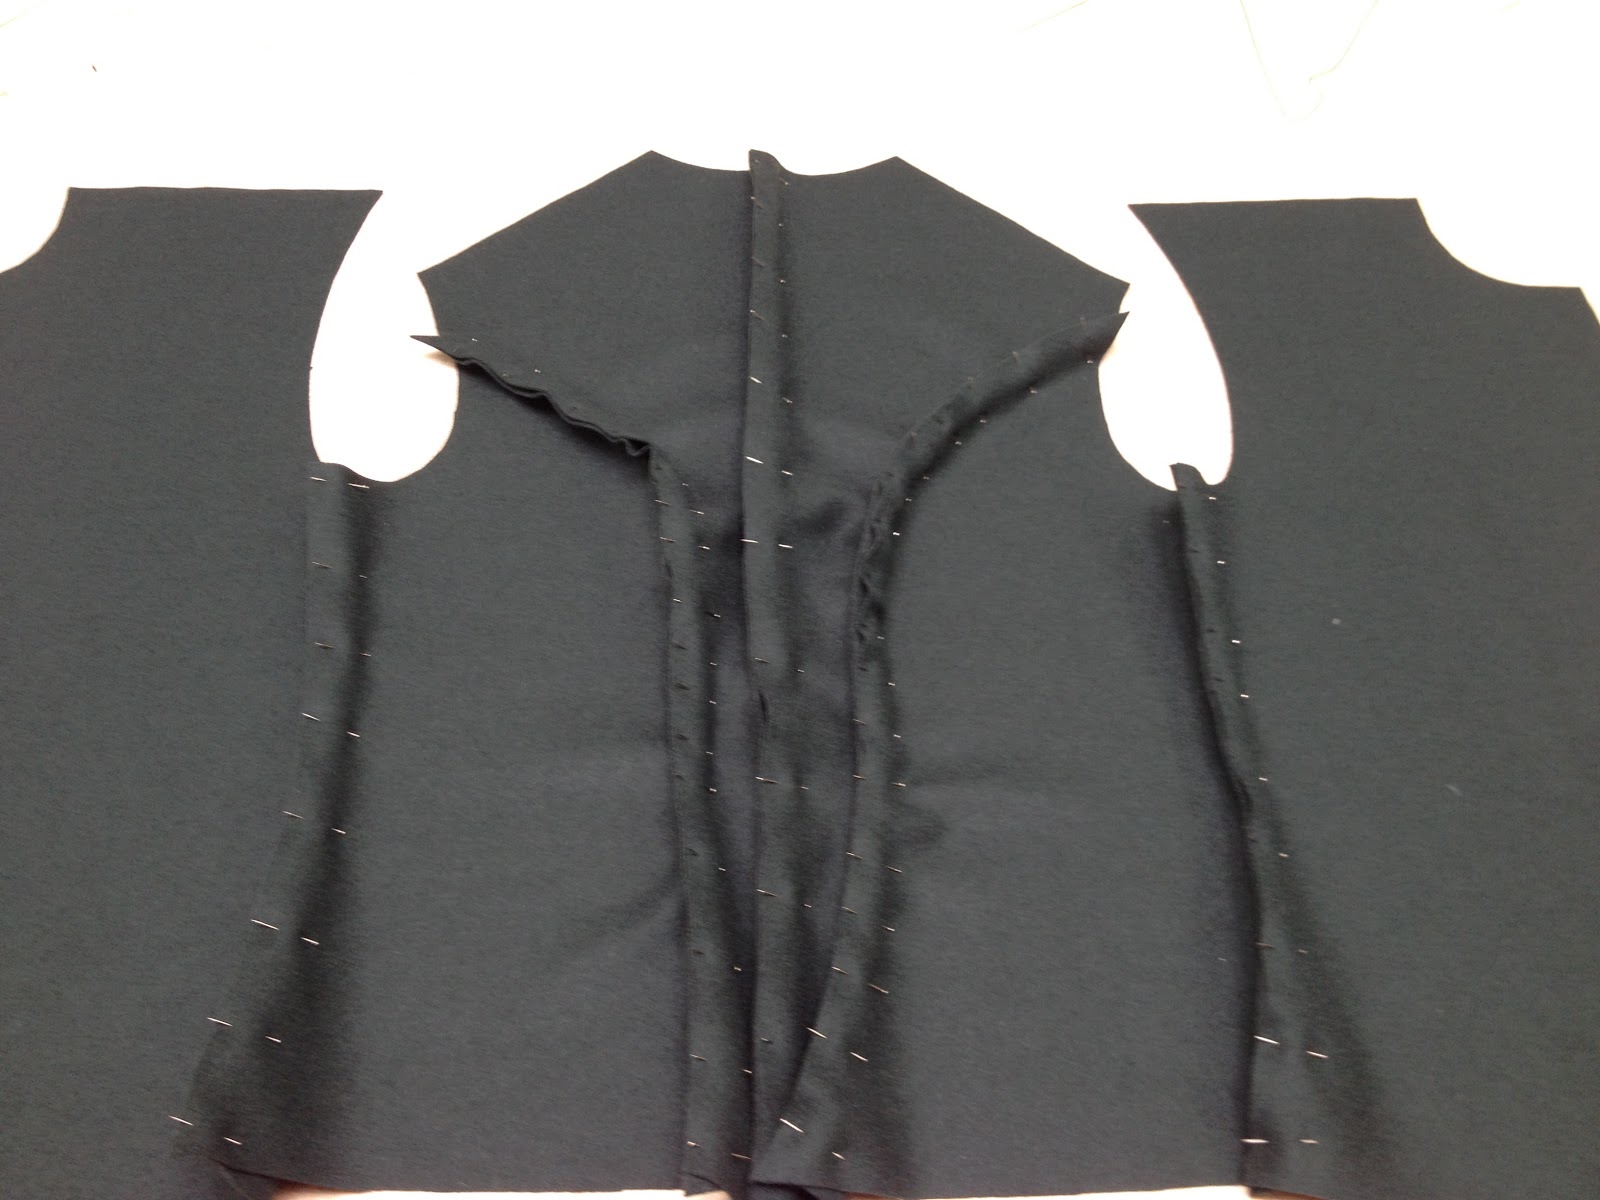
Once I had altered my pattern pieces I produced the second toile. You can see how I have created the point at the front of the tunic, raised above the hips and shaped again at the back to a more subtle point. I decided to go for a shorter style of tunic, as when I refer back to the way in which they sat from looking at photos from the Napoleonic period, the dolman sat almost above the hips. This would be due to the dolman needing to be shorted than the pelisse length which would potentially be worn over the dolman of not fastened over the shoulder. I've looked at many different styles of a hussar jacket; some styles are considerably more like a jacket that is of a jacket length, however this was not the look that I was going for. I want the tunic to be much more shaped to the body.


I am really impressed with the way that this fits. There are some areas that could do with a little more shaping in to the body however, I have to consider that there are many layers of thick fabric, padding and interlining that will be constructed together for the final piece. Therefore it would be wide for me to keep the shape and room for ease as it is to prevent problems in later on. It is difficult to judge whether the final fabric which I am using would sit in the same way as this canvas, because they are completely different types of thickness and weight. Ideally I would have used fabric that it more similar to the Pilot cloth fabric which I will be using for the final tunic. However, I did not have the luxury of spending lots of money on other fabric as the Pilot cloth itself was expensive to purchase. This meant I would have to make compromises in other areas, plus, canvas is much more accessible. For example, instead of purchasing new canvas I managed to take apart other toiles that I had made from other projects and use that material which saved me money. I think that it is important as a costume maker that works to a budget to interpret the necessary from the issues that can have alternative routes. Using this typical canvas fabric just meant that I had to keep the size slightly bigger rather than too small, so as when tack together the final fabric panels together I can adjust them to a better shape if necessary.

I decided that due to the shape of my model, I wouldn't create as much of a pronounced chest as traditionally. There is a slight shaping to the centre front, which I found to sit better than any more unnecessary shaping. I decided to take the route of fitting the jacket to the models own shape rather than focusing on general shaping that I have found on period military tunic patterns. Although they are a great help towards my judgement calls, it is important to realise what suits your client best, which is what I learnt from Graham Hunter.

I swithered about having a back seam, because when I investigated in to different tunics I noticed that most of the time there isn't one. However I personally preferred the look of many different panels at the back. If I were making this costume historically accurate I would be more inclined to specify whether this is an element that I could definitely incorporate in to my garment or not. However, I look at this as more of a trial to see what stage I am at exactly when it comes to constructing a jacket of this nature, and realise what steps I would need to take and consider in future to develop my skills even further and to an even more professional level.
Due to factors out with my control I was not able to continue any further with the tunic. This was because my Russia braid which I had ordered three weeks ago still hadn't arrived. Even after there being a 5 working day guarantee delivery and sending countless emails, it goes to show you can't always foresee issues that may arise. This has had a knock on effect in my progress because I cannot yet construct the tunic without having stitched the braiding on to both tunic fronts as singular pieces. Having the fronts flat and detached makes the positioning and stitching of the braid much easier rather than if the jacket was completely constructed together.
This wouldn't be ideal if I were making this costume for a customer that needed it by a specific deadline. However, this process is about trial and error, and I have learnt that in future this particular company isn't necessarily reliable for their time keeping and it might be wise not to order from them in future. It has been a difficult journey for me because in this context because I haven't experienced making a costume of this style before therefore I have had little knowledge on fabrics and suppliers. All the knowledge that I have gathered has been through investigative means and has taken a long time to culminate. However, the good thing about this project is that it has let me experience what it is like sourcing and buying from suppliers, as well as being able to start building up samples and a network of suppliers that will be of great use to me in the future. I think that it is very important as a costume maker to accumulate a list of reliable suppliers as well as a samples book so that in future it will be much simpler process due to this previous investigative experience of. As I said, this project has mostly been about investigating other than anything else, so that for similar future endeavours I will have a clearer starting point and route to go down. This means that in future it will be much easier for me to plan exactly when and where to purchase fabric from so as that I can expect and rely on everything arriving at the right time. It has been a valuable lesson in time management, and how crucial this is when making a costume for a customer.
No comments:
Post a Comment